What is Audio Ducking
And why it makes your videos sound better
And why it makes your videos sound better
22 aug 2024
Ever watched a video where the music is so loud you can barely hear the dialogue? It’s frustrating and can make the difference between a professional and amateur production. This is where audio ducking comes in—a technique used to balance audio levels to ensure clear audio in your video. Whether you are making corporate videos, podcasts, after-movies, doing interviews and so on, audio ducking makes your video sound professional.
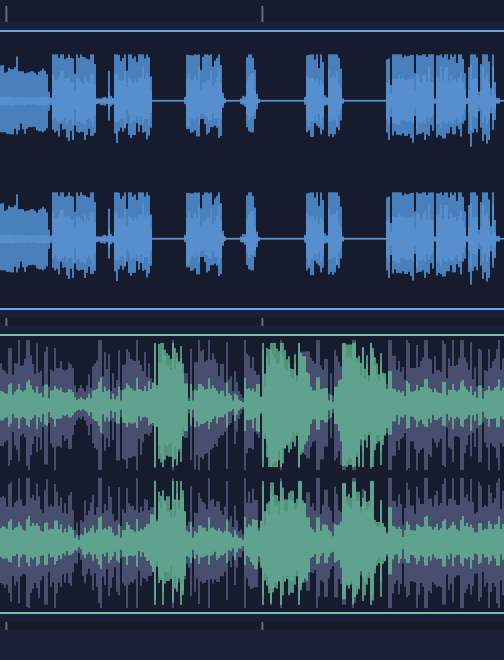
Audio ducking is an essential tool in video production used to balance the volume between different audio tracks. It automatically lowers (ducks) the volume of one track when another, more important, track is present.
For example, when someone is speaking, the background music will automatically decrease in volume, so you can make sure the dialogue is clear and easy to hear. You don’t want the background music to be lower in volume the whole time. What audio ducking also does, is return the background music to its original level once the dialogue stops.
Audio Ducking ensures that dialogue and important sounds are never overshadowed, providing a professional and clear audio experience.

Using audio ducking in your video projects offers several benefits:

Most NLEs (non-linear editors) or automatic mixing software, like End Boost, offer an option for audio ducking. How you use this feature and what the results sound like depends on the type of software you’re using. When using an NLE like Adobe Premiere Pro or DaVinci Resolve to set up audio ducking, you have more control compared to when you’re using End Boost. However, using End Boost can save a lot of time and simplify your workflow. In this article, we’ll dive into the ducking options in both Premiere Pro and End Boost so you can decide which one works best for your needs.
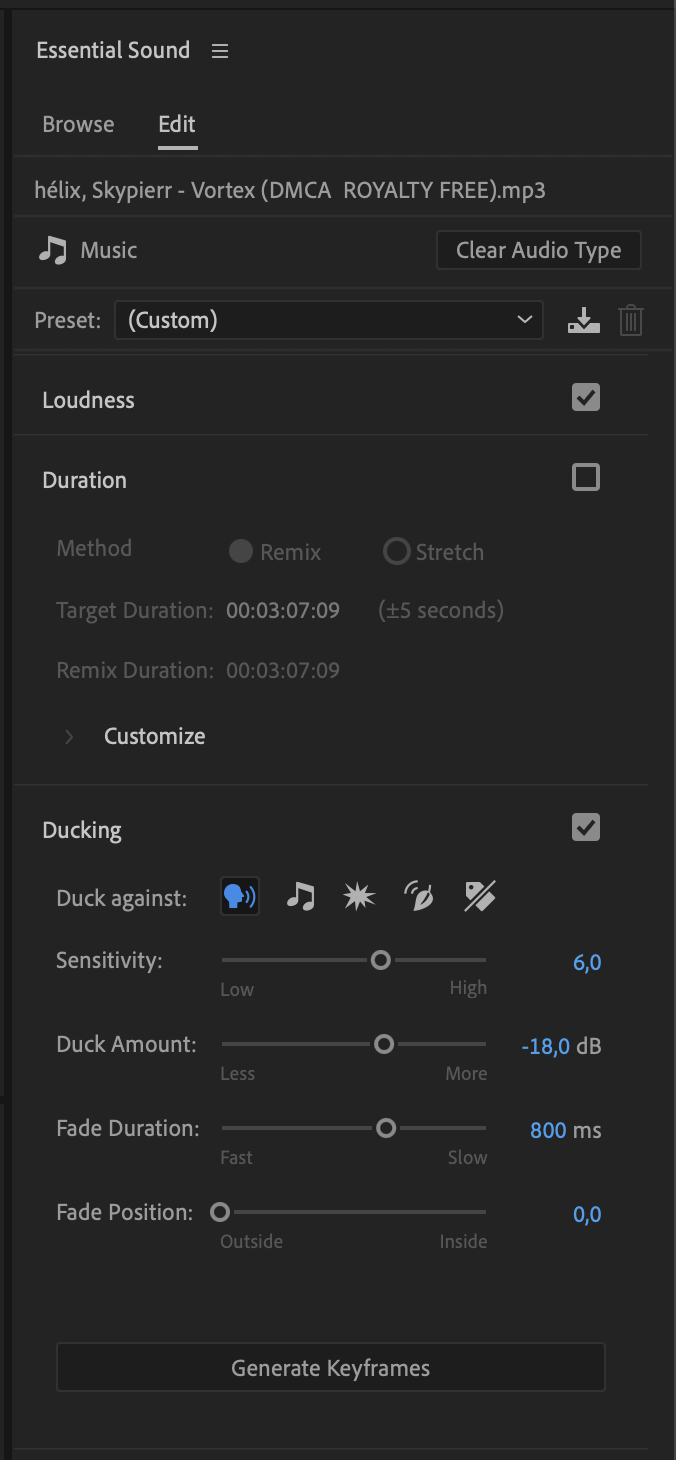
Adobe Premiere Pro provides a solid workflow for adding audio ducking to your project. With its AI-assisted features, a lot of the work is done for you. The software automatically tags your audio tracks and adds keyframes to them. The Essential Sound panel still allows you to fine-tune your ducking settings to achieve the desired result.
When you add audio to your timeline, Adobe Premiere Pro automatically tags the tracks as Dialogue, Music, SFX, or Ambience. Be sure to check that all the tracks are tagged correctly. If not, you can easily change the audio type in the Essential Sound panel.
In the Essential Sound panel, there is a checkbox for activating ducking. Once you click on it, options will appear, giving you sliders to control the ducking. First, choose which audio type the software should duck against. For example, if you’re editing an interview with background music, you would select the music track to duck against the dialogue. By clicking the ‘Generate Keyframes’ button, Premiere Pro will automatically add keyframes to the selected audio track. You can manually adjust these keyframes if needed, or simply tweak the sliders until you’re happy with the ducking effect.
The ducking process in Adobe Premiere is straightforward, and the AI makes it easier to handle. Having some audio mixing knowledge is needed to get the best results, and it still requires some time to fine-tune.
Unlike Adobe Premiere, End Boost is dedicated audio mixing software designed for video editors. You can use End Boost as an extension of Premiere Pro (or other NLEs like DaVinci Resolve). End Boost doesn’t require any audio expertise, making it perfect for video editors who want professional sound without spending too much time on audio tasks. It’s compatible with many NLEs, including Premiere Pro and DaVinci Resolve.
When using End Boost, you can leave your audio tracks untouched in Premiere Pro. Simply load them into the timeline on different tracks, export each as a solo track, and then import them all into End Boost.
Before letting End Boost handle the work, check that all the tracks are tagged with the correct audio type. Once everything is properly tagged, select the track you want to apply ducking to. For example, in the interview with background music, click on the music track in the panel and choose either ‘Obvious’ or ‘Subtle’ under the auto-ducking tab. That’s it! Audio ducking is now activated, and the AI will take care of the rest.
Of course, End Boost offers more than just ducking. If you want to explore its full capabilities, check out our article on AI features in End Boost.

Audio ducking is key for clarity, but End Boost offers much more. It automatically mixes your audio, applying compression, limiting, and custom volume curves. Compatible with Premiere Pro, DaVinci Resolve, Final Cut Pro X, Magix Vegas, and more, End Boost makes getting a great mix easy. Learn more about End Boost today.
Interested in a free fully functional 7-day trial? Mail us at support@alexaudiobutler.com.